Roasted Cauliflower & Mushroom Quinoa Salad: The Cozy, Wholesome Bowl You’ll Crave
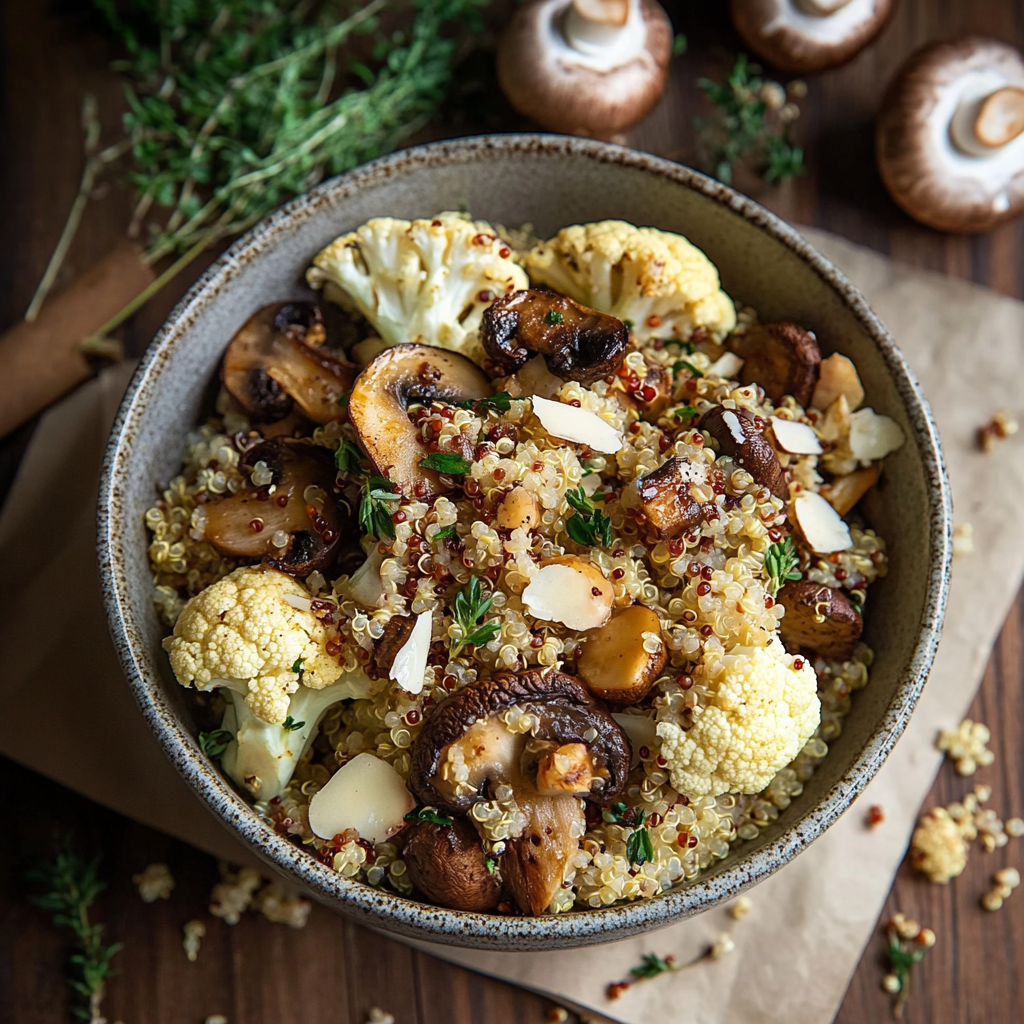
Hey there, fellow food adventurer! You know those days when your fridge feels emptier than you’d like, but somehow, you end up pulling together something truly magnificent? Well, let me take you to one of those magical moments in my kitchen. Imagine golden-brown cauliflower, with its edges crisped to perfection. Think of those meaty, umami-filled mushrooms, roasted to absorb every bit of smoky flavor. And, nestled around them, fluffy quinoa—light, yet filling and satisfying. That, my friends, is the magic of this Roasted Cauliflower & Mushroom Quinoa Salad.
But this salad isn’t just about the flavors. It’s about taking those humble veggies, the ones we all sometimes overlook in our crisper drawers, and turning them into a meal that’s hearty, nutritious, and unapologetically delicious. Seriously, if you need a comforting dish that feels like a warm hug but is also light enough to fuel your day, this is the one.
This beauty was born on a chaotic Tuesday when my fridge was looking a little sad and my inspiration was in short supply. I found three half-usable carrots, half a cauliflower, and a lonely bag of quinoa tucked behind the soy sauce bottle. And that’s when the lightbulb went off. From this collection of leftovers, this salad emerged, and it has been a “please make it again” staple in our house ever since. Packed with plant-powered protein and fresh flavors, it’s totally vegan-friendly (just skip the feta, if you’re going plant-based!) and so versatile, it’ll surprise you. Serve it warm, cold, or, if you’re like me, straight from the mixing bowl. There are endless ways to enjoy it! So, are you ready to get cooking? Let’s get those veggies singing!

The Day My Fridge Saved Dinner (True Story!)
Okay, let’s get real here for a second. I’ve definitely had those moments when life is so busy, I forget to make it to the grocery store. (Hey, don’t judge—I’m sure you’ve had your cereal-for-lunch moments too!) Flashback to last winter: a Tuesday afternoon, nothing in the fridge except some vegetables that were just barely hanging on to life. But this time, it wasn’t the usual scramble for a takeaway menu. I spotted a cauliflower, some forgotten mushrooms, and—there it was—a bag of quinoa hiding behind the soy sauce bottle. That’s when the magic happened.
I roasted those veggies until they were caramelized to perfection, tossed them together with lemony quinoa, and held my breath as my teen reluctantly took the first bite. And then—wait for it—he gasped and said, “Mom, this is BOMB!” 😱
That’s when I realized something important: even on the craziest days, with nothing but a half-filled fridge, I could make something that would become a weekly favorite. And that’s how this Roasted Cauliflower & Mushroom Quinoa Salad went from “Oh no, what’s for dinner?” to the reigning champion of our Meatless Monday rotation. This recipe is proof that miracles happen in the kitchen, especially when you’re too tired to care and just want something delicious to appear out of thin air. 😅
Your Grocery List (Plus Chef Secrets!)
So, let’s break down the ingredients. These aren’t just any ingredients—they’re the foundation for a meal that can turn a lonely Tuesday evening into something extraordinary.
-
1 small cauliflower – The absolute MVP of this dish. Make sure to break it into bite-sized florets for maximum crispiness when roasted. If cauliflower isn’t in season or you just can’t find it, feel free to swap it out for broccoli. Both options bring tons of flavor and texture.
-
200g mushrooms – Choose your mushrooms wisely! I typically go for cremini mushrooms, which have a wonderful earthiness to them. Button mushrooms are a milder option, while shiitake mushrooms bring an extra punch of umami. Not into mushrooms? No problem—zucchini would make a great stand-in!
-
Olive oil & salt – Trust me, these two are the dynamic duo in this recipe. The olive oil ensures the veggies get crispy edges and the salt helps enhance all those natural flavors. Don’t skimp on these—they’re the backbone of the dish.
-
1 cup quinoa – Don’t forget to rinse the quinoa! That’s right, rinse it under cold water to remove its natural saponins, which can make it taste a bit bitter. Also, cooking it in vegetable broth (or chicken broth, if you’re not vegan) instead of plain water will give your quinoa a more flavorful base. Trust me—it’s worth it.
-
Lemon juice & parsley – These are your flavor boosters, the things that will take this dish from good to great. If you don’t have fresh lemons, you can substitute apple cider vinegar in a pinch, though it’s not quite the same.
-
Feta/nuts (optional) – Okay, now we’re talking the wow factor. If you’re going vegan, skip the feta and add toasted nuts instead! I’m partial to toasted almonds for their crunch and mild flavor, but feel free to experiment with your favorite nuts. If you want to keep it truly plant-based, you can use a vegan cheese substitute or skip this entirely.
Let’s Get Cooking: Crispy, Lemony, Perfectly Balanced
Now that you’ve gathered everything, it’s time to get down to business. The best part about this recipe is how simple it is. Don’t worry—this is the kind of meal where even beginners can shine in the kitchen.
Step 1: Roast Those Veggies Like a Pro
Preheat your oven to 400°F (200°C). While that’s heating up, toss the cauliflower and mushrooms with 1 tablespoon of olive oil, salt, and pepper in a bowl. Here’s a chef hack for you: Line your baking sheet with parchment paper. Why? Because it prevents the veggies from sticking to the pan and makes for an easy cleanup afterward. (You’re welcome!) Spread the veggies out in an even layer on the baking sheet, then roast them for about 25 to 30 minutes. You’ll know they’re done when they’re golden brown and fork-tender.
Important tip: Don’t stir the veggies too much while they’re roasting! Those crispy bits that form on the edges? That’s where the magic happens. Let them be!
Step 2: Quinoa 101
While your veggies are roasting, it’s time to make the quinoa. Start by rinsing it under cold water. This is a crucial step because quinoa can have a bitter taste if you don’t wash it well. Next, place the rinsed quinoa in a pot with 2 cups of vegetable broth or water. Bring it to a simmer, then cover and cook for about 15 minutes. Once the liquid is absorbed, remove it from the heat and let it sit for a few minutes. Don’t skip this next step: Fluff it with a fork, and leave it uncovered for a couple more minutes so it can steam and become extra fluffy.
Pro tip: If you’re feeling fancy, throw a garlic clove in the pot while cooking the quinoa. It’ll infuse a subtle garlic flavor that will elevate the dish.
Step 3: Mix & Marvel
Okay, this is the fun part. In a large mixing bowl, combine your roasted veggies with the quinoa, 2 tablespoons of parsley, 2 tablespoons of lemon juice, and 1 tablespoon of extra olive oil. Take a moment to taste it—does it need more lemon? Maybe a bit more salt? If you want an extra zing, toss in some lemon zest. Just go slow with the salt—you can always add more, but you can’t take it out once it’s in there!
Serving Vibes: How to Make It Instagram-Worthy
Now that you’ve got your salad all mixed up, it’s time to plate it. Trust me, the way you serve it can make all the difference. Pile the salad high in a rustic bowl, and for that final wow factor, top it with crumbled feta (or toasted nuts if you’re going vegan), a sprinkling of parsley, and a handful of toasted pine nuts.
Want to serve this for a summer picnic? It’s just as delicious chilled, and it pairs perfectly with a side of crusty bread. If you’re prepping for the week ahead, you can make this into a meal prep dream by dividing it into jars. Put the quinoa at the bottom, followed by the roasted veggies on top. Store the dressing separately until you’re ready to eat.
5 Fun Twists to Keep It Fresh
As much as I love the original version of this recipe, sometimes I like to switch things up! Here are a few twists you can try:
-
Mediterranean: Add kalamata olives, sun-dried tomatoes, and oregano to give it a Mediterranean flair.
-
Spicy Kick: For those who love a little heat, toss in some harissa paste or chili flakes.
-
Protein Power: Want a protein boost? Top it off with grilled chicken or roasted chickpeas.
-
Fall Flavors: Swap the cauliflower for roasted butternut squash for a seasonal twist.
-
Creamy Dream: Drizzle the salad with tahini dressing for a creamy, nutty richness.
Chef’s Diary: Lessons from My Kitchen Wins (and Fails!)
Ah, the trials and triumphs of the kitchen. Funny story: I once turned my quinoa into a mushy mess by forgetting it was simmering. (Lesson learned—I now set a timer!) And as for the veggies, we’ve added toasted walnuts (thanks to my nut-obsessed husband) and even a little balsamic glaze on top for a sweet tangy finish. The beauty of this dish is that it’s forgiving. Overcooked veggies? Call it a grain bowl. Burnt edges? “Smoky flavor.” See? It’s practically foolproof. 😉
Reader Q&A: Your Salad Dilemmas, Solved!
Q: My veggies got soggy—help!
A: It happens! But don’t panic. The most common culprit is overcrowding on the baking sheet. Spread them out in a single layer, and if you need to, use two sheets. And definitely don’t stir them halfway through roasting—those crispy edges are too good to lose.
Q: Can I meal prep this?
A: You bet! Just store the salad undressed in the fridge for up to 4 days. Add nuts or feta just before serving to keep them fresh.
Q: Quinoa tastes bitter—what did I do wrong?
A: Ah, this is a common problem! If you didn’t rinse the quinoa thoroughly before cooking, it can retain its natural bitterness. Make sure to give it a good rinse under cold water next time!
Nutrition Per Serving (Because You Asked!)
Calories: ~220
Protein: 8g
Fiber: 6g
Vegan Option: Yes!
Gluten-Free: Naturally!
And there you have it! A cozy, wholesome, and delicious Roasted Cauliflower & Mushroom Quinoa Salad that will fill your kitchen with good vibes and even better flavors. Enjoy!