Easy Refrigerator Pickled Vegetables

This recipe brings back memories of Grandma’s kitchen—jars lined up on the counter, filled with colorful veggies and the sharp, joyful scent of vinegar in the air. These quick pickles are bright, zesty, and perfect for snacking or sprucing up any meal. Make a batch today and let the flavors dance on your tongue!
- Prep Time: 15 mins
- Cook Time: 5 mins
- Total Time: 20 mins + chill time
- Yield: 4 1x
Ingredients
2 cups cauliflower florets
1 cup sliced carrots
1 cup sliced cucumbers
1 red bell pepper, sliced into strips
1 cup green beans, trimmed
3 cloves garlic, minced
2 cups white vinegar
2 cups water
2 tbsp salt
1 tbsp sugar
2 tsp mustard seeds
1 tsp black peppercorns
½ tsp red pepper flakes (optional)
Instructions
Wash and prepare all vegetables. Place them evenly into clean glass jars.
In a saucepan, bring vinegar, water, salt, sugar, mustard seeds, peppercorns, and garlic to a boil. Stir until salt and sugar dissolve.
Carefully pour hot brine over vegetables in jars, covering completely.
Add red pepper flakes if desired. Seal jars with lids.
Let cool, then refrigerate for at least 24 hours before enjoying.
Notes
A jar of joy—simple, sharp, and bursting with garden-fresh crunch.
Nutrition
- Calories: ~20
- Sugar: 2g |
- Sodium: 310mg
- Carbohydrates: 4g
- Fiber: 1g
Easy Refrigerator Pickled Vegetables – Your New Crunchy Obsession! 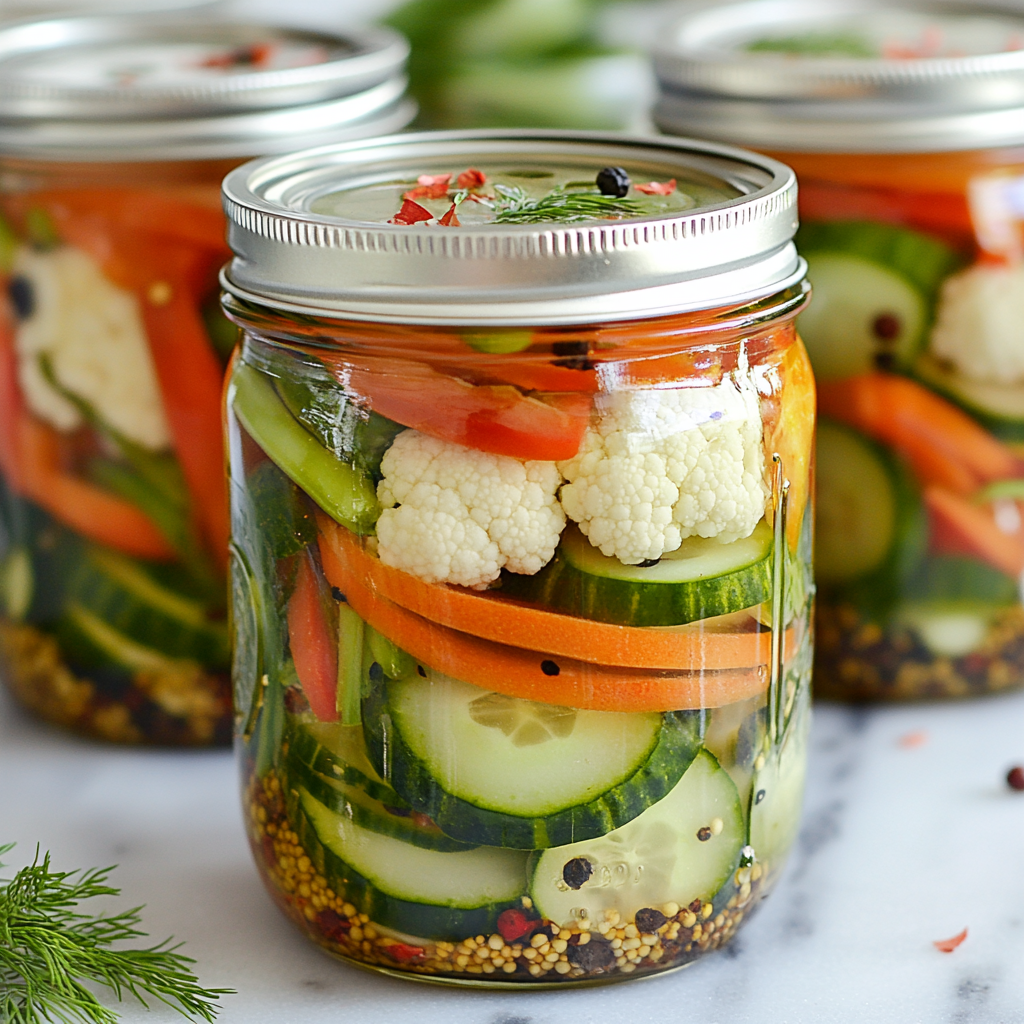
Hey friends, Wyatt here! Can you smell that? Sharp, tangy, and buzzing with excitement? That’s the scent of vinegar doing its magic dance in my kitchen today, and it’s bringing back a flood of memories. Picture this: golden afternoon light streaming through Grandma’s kitchen window, rows of jewel-toned jars lining her countertop like edible stained glass. The air practically hummed with anticipation as those veggies transformed into something extraordinary. That’s the joy I’m bringing to your kitchen today with these ridiculously easy refrigerator pickled vegetables!
Forget complicated canning setups or waiting weeks for flavor to develop. These quick pickles are your golden ticket to crunchy, bright, tangy goodness in just 24 hours. They’re the superhero of condiments – ready to rescue sad sandwiches, jazz up boring salads, or become the star of your next cheese board. And the best part? You don’t need any fancy gear, just a pot, some jars, and that adventurous spirit I know you’ve got tucked away. Whether you’re drowning in CSA veggies or just craving that addictive vinegar punch, this recipe is your new best friend. So roll up those sleeves, grab your favorite veggies, and let’s make some jarred happiness together!
Grandma’s Countertop Rainbows
Let me take you back to sticky Indiana summers at Grandma Ethel’s farmhouse. Her kitchen was command central for all things delicious, but nothing captured my imagination quite like Pickle Day. I’d perch on that rickety wooden stool, legs swinging, watching her transform ordinary garden haul into something magical. She’d hand me green beans like edible swords and cucumber coins perfect for nibbling “just to test.” The vinegar brine bubbling on her old cast-iron stove smelled like adventure – sharp, exciting, and utterly irresistible. I remember the satisfying clink as she’d line up those jars on the sun-warmed counter, each one a vibrant little ecosystem. Waiting 24 hours felt like an eternity! But oh, that first crisp bite of her tangy carrots? Pure childhood wonder in every crunch. Making these quick pickles now isn’t just cooking; it’s time travel with a side of serious flavor. Every jar feels like a high-five to Grandma and her delicious legacy.
Gather Your Crunch Crew
Here’s the beautiful part: This recipe is more of a vibe than a rigid rulebook! Swap veggies based on what’s seasonal or hiding in your crisper. The brine is your flavorful foundation – adjust spices to make it your own signature tang. Let’s break it down:
- 2 cups cauliflower florets (bite-sized): These little clouds soak up brine like champs! Chef’s Tip: Break them slightly smaller than other veggies for even flavor penetration. Swap: Broccoli florets for a different cruciferous crunch.
- 1 cup sliced carrots (¼-inch coins or sticks): Classic crunch and natural sweetness! Chef’s Insight: Slice them evenly so they pickle uniformly. Swap: Rainbow carrots for a gorgeous color pop.
- 1 cup sliced cucumbers (¼-inch rounds): The refreshing backbone! Pro Move: Use mini cukes or Persian cukes – fewer seeds, more crunch. Swap: Zucchini for a summer twist.
- 1 red bell pepper, sliced into strips: Sweetness and vibrant color! Why it Rocks: Adds a juicy bite against the crunchier veggies. Swap: Yellow or orange peppers for sunshine in a jar.
- 1 cup green beans, trimmed: The satisfying snap factor! Substitution Savvy: Asparagus spears (blanched 1 min first) make a fancy alternative.
- 3 cloves garlic, minced: Flavor powerhouse! Chef’s Confession: I often toss in a whole extra clove because… garlic. Swap: ½ tsp garlic powder in a pinch.
- 2 cups white vinegar: The tangy engine! Flavor Twist: Swap half for apple cider vinegar for a mellower, fruity tang.
- 2 cups water: Balances the sharpness. Important Note: Filtered water is best if yours is heavily chlorinated.
- 2 tbsp salt: Crucial for flavor and crispness! Must-Use: Pure kosher salt or pickling salt. Avoid iodized table salt – it can cloud brine.
- 1 tbsp sugar: Just a hint of sweetness to round things out. Dietary Swap: Honey, maple syrup, or omit for keto.
- 2 tsp mustard seeds: Tiny flavor bombs! They add complexity and a subtle pop. Fun Fact: Yellow or brown seeds both work great!
- 1 tsp black peppercorns: Warm, earthy depth. Chef’s Hack: Lightly crush a few in your palm before adding for extra aroma.
- ½ tsp red pepper flakes (optional): Your heat dial! Spice Level: Start here and add more next batch if you like it fiery!
Let’s Get Pickling! (It’s Easier Than You Think)
Ready to transform those crisp veggies into tangy treasures? Follow these simple steps – I’ve packed each one with tips I’ve learned through (many) happy jars!
- Prep Your Veggie Posse: Wash everything thoroughly! Slice the carrots, cucumbers, and bell pepper. Trim the green beans. Break the cauliflower into small, bite-sized florets (they shrink a tad in the brine!). Wyatt’s Wisdom: Uniform size = even pickling! Don’t crowd the veggies yet – keep them separate for now.
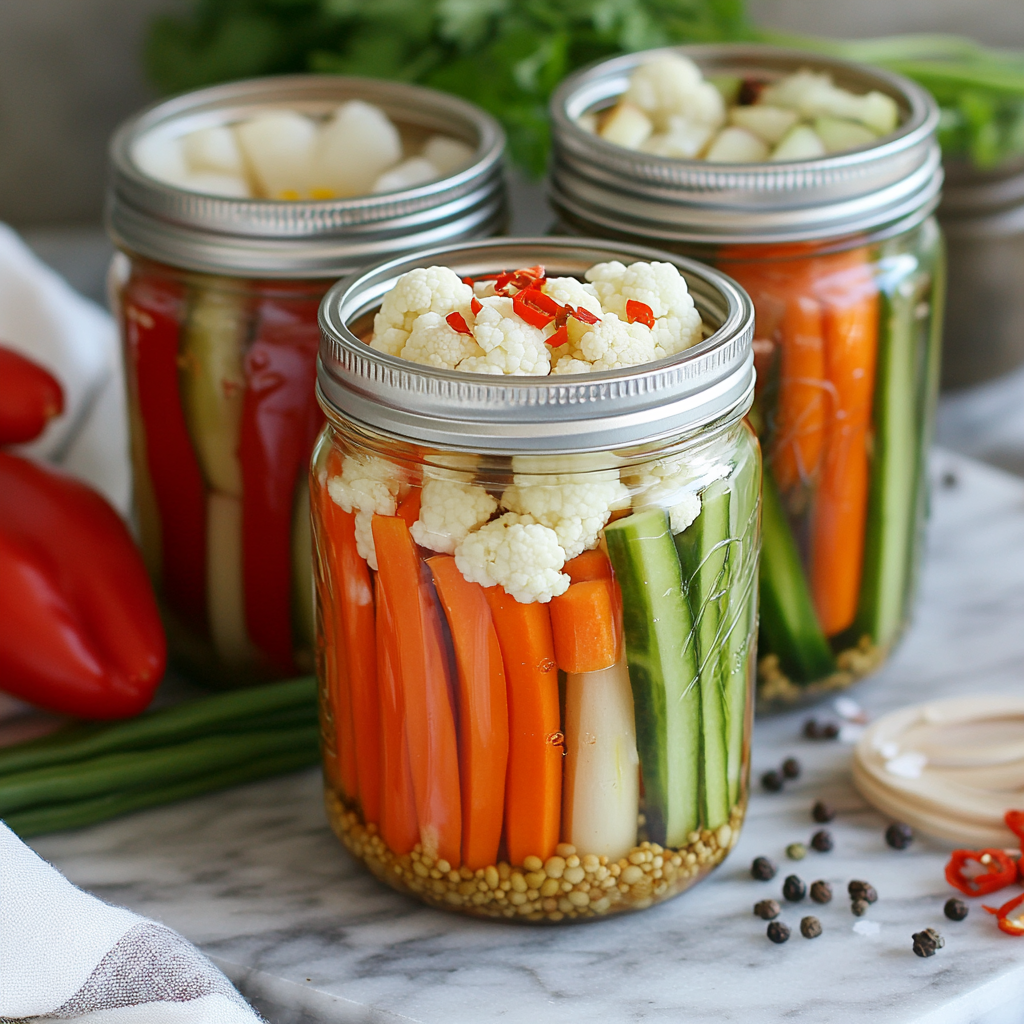
- Jar Assembly Time: Grab clean quart-sized mason jars or any large, clean glass containers with tight-fitting lids. Hot Tip: Run jars through a dishwasher cycle or rinse with boiling water for extra cleanliness – no need for full sterilization for fridge pickles! Start layering your veggies artistically or just pack them in snugly. Pro Layer Move: Place garlic cloves and peppercorns throughout the layers for even flavor distribution. Pack those jars right up to about 1 inch from the rim!
- Brine Brilliance: In a medium saucepan, combine the white vinegar, water, salt, sugar, mustard seeds, and those crushed black peppercorns (if you crushed them). Flavor Boost: Toss in the minced garlic now too – it infuses the brine beautifully! Set the pan over medium-high heat. Bring this mix to a lively boil, stirring occasionally until the salt and sugar completely dissolve. This takes about 3-5 minutes. Key Moment: Once it boils, let it bubble vigorously for just 1 full minute – this wakes up the spices!
- The Big Pour (Carefully!): Here comes the fun (and steamy!) part. Slowly and carefully pour the hot brine over the packed vegetables in your jars. Safety First: Use a funnel if you have one! Ensure the brine completely submerges the veggies. Leave about ½ inch of headspace at the top. Wyatt’s Trick: Tap the jar gently on the counter to release any trapped air bubbles. See a veggie peeking out? Use a clean spoon to push it down!
- Spice It Up & Seal: If you’re using the red pepper flakes for heat, sprinkle them evenly over the top of the brine in each jar now. Screw on the lids tightly while the jars and brine are still hot. Listen for the Music: You might hear a satisfying little *pop* as they cool and seal slightly – that’s the sound of pickle success starting!
- The Waiting Game (The Hardest Part!): Let the jars cool completely on your countertop. Once cool, pop them straight into the refrigerator. Patience Pays: Resist the urge for at least 24 hours! This gives the flavors time to mingle, dance, and work their tangy magic into every nook and cranny of your veggies. For peak perfection? Let them hang out for 48 hours. You’ll thank me later!
Show Off Those Tangy Stars!
Okay, the wait is over – time to crack open that jar of sunshine! These pickles aren’t just condiments; they’re flavor fireworks waiting to elevate anything they touch. Drain them briefly (save that brine for cocktails or marinades!) and get creative. Pile them high on a juicy burger or pulled pork sandwich for an instant crunch upgrade. Toss a generous handful into your lunchtime salad for a serious zing factor. Arrange them artfully on a cheese or charcuterie board – they cut through rich cheeses like a dream. Need a killer snack? Grab a fork and eat them straight from the jar (no judgment here!). They’re also fantastic chopped up in tuna or chicken salad, or even as a bright garnish for tacos or grilled fish. Basically, if it needs a burst of bright, tangy crunch, these pickles are your answer!
Make It Your Own Delicious Adventure!
This recipe is your playground! Once you’ve mastered the base, unleash your inner pickle artist with these fun twists:
- Dill Dynasty: Add 3-4 sprigs of fresh dill and a teaspoon of dill seeds to the jar for classic deli vibes. Perfect with cukes and green beans!
- Sweet Heat Sensation: Swap white vinegar for apple cider vinegar, double the sugar, and add 2 thinly sliced jalapeños (seeds in for fire!). Amazing with carrots and cauliflower.
- Asian Zing: Replace mustard seeds and peppercorns with 1 tbsp sliced fresh ginger, 1 star anise pod, and a splash of soy sauce (reduce salt slightly). Killer with daikon radish and shiitake mushrooms!
- Mediterranean Magic: Add 1 tbsp dried oregano, 1 tsp lemon zest, and a handful of pitted Kalamata olives to the jar. Fabulous with artichoke hearts and fennel.
- Low-Sodium Love: Reduce salt to 1 tbsp and add extra garlic, herbs (like thyme or rosemary), or a splash of citrus juice (lemon/lime) for brightness.
Wyatt’s Pickle Perks & Quirks
Man, this recipe has seen some things! Remember my first solo batch? I got overzealous with the red pepper flakes – let’s just say those pickles could’ve doubled as fire alarms! Lesson learned: start mild, you can always add heat later. Over the years, I’ve learned a few golden rules. Veggie Texture is Key: Super fresh, crisp veggies = the best pickles. If your carrots are bendy, skip ’em! Brine Power: That leftover brine? Liquid gold! Use it to quick-pickle onions for tacos, splash it into potato salad dressing, or even add a tangy kick to Bloody Marys (Grandma Ethel would approve!). Storage Smarts: Always use clean utensils to pull pickles out of the jar to prevent spoilage. And while these aren’t shelf-stable canned pickles, they easily keep for 3-4 weeks in the fridge – if they last that long! The beauty is in the simplicity and the endless tweaks. Make a batch, take notes, and next time, make it uniquely YOURS. That’s the real joy of pickling!
Pickle Problems? We’ve Got Answers!
New to the quick-pickle game? No worries! Here are the top questions I get (and have definitely asked myself!):
- Q: Help! My pickles turned out kinda soft, not crunchy. What happened?
A: Ah, the dreaded soft pickle! A few culprits: Overcooked veggies (the hot brine will cook them slightly, so starting with super fresh is vital!), using veggies prone to softening (like zucchini – blanch it first!), or letting them pickle waaaay too long (stick to 1-4 weeks max). Adding a grape leaf or a pinch of black tea leaves (tannins!) to the jar can help maintain crunch next time! - Q: How long do these actually last in the fridge? Can I reuse the brine?
A: Properly stored (always submerged in brine, clean utensils used), they’ll stay deliciously crisp and safe for 3-4 weeks. Reusing brine? You can! Strain it, bring it to a boil again, cool it slightly, and pour over fresh veggies. Flavor will be milder each time. I usually get one solid reuse. - Q: Can I make these without sugar? And what salt is REALLY best?
A: Absolutely! Skip the sugar entirely for a sharper profile, or sub with a keto-friendly sweetener like erythritol (dissolve well!). Salt is CRITICAL: Use pure kosher salt (like Diamond Crystal) or pickling salt. Iodized table salt can make brine cloudy and taste metallic. Sea salt works too, but avoid ones with anti-caking agents. - Q: I forgot the red pepper flakes! Can I add them later?
A: You bet! Sprinkle them into the jar anytime, even after refrigeration. They’ll infuse flavor over the next day or so. Want more garlic punch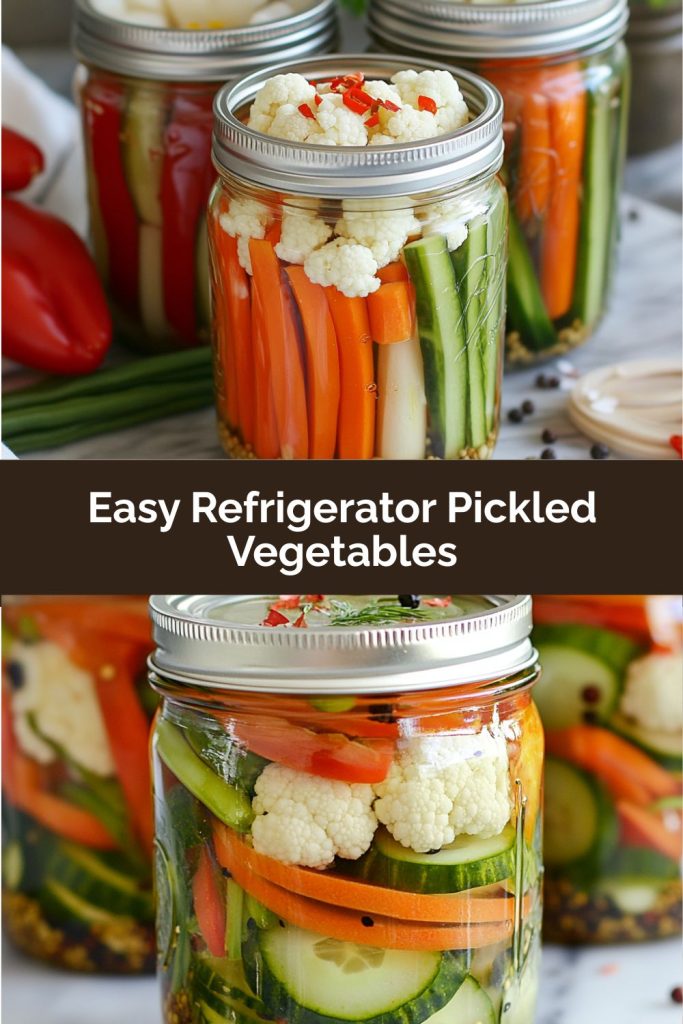
- There’s just something magical about capturing the brightness of summer in a jar. Whether you’re chasing childhood memories like I am or just craving a crisp, tangy snack, these quick pickles deliver joy with every bite. They’re proof that a little vinegar, a handful of fresh veggies, and a splash of curiosity can turn the ordinary into something unforgettable. Now go forth and pickle, my friend—you’ve got Grandma Ethel cheering you on.