
Sunny Days, Crispy Bites: Let’s Make Tuna Avocado Crispy Rice Salad!
Picture this: It’s a lazy Saturday afternoon, the sun’s warming your patio table, and you’re craving something light yet stupidly delicious. Something that feels fresh but still indulgent, and—let’s be real—something you can eat with your hands and enjoy with a cold drink on the side. Enter my Tuna Avocado Crispy Rice Salad – the lovechild of sushi night and a farmers’ market haul. It’s the kind of dish that transforms any occasion into an unforgettable one, whether you’re hosting a dinner party, having a solo indulgence, or looking to impress your friends without much effort.
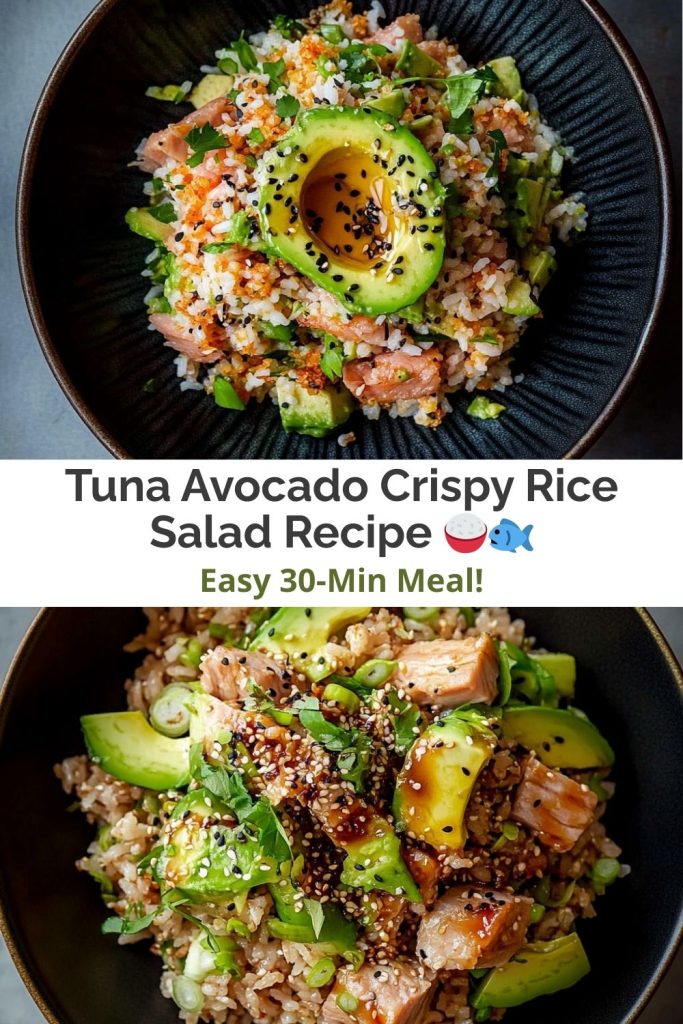
This dish isn’t just food; it’s a vibe. Imagine crispy rice squares that crackle like autumn leaves underfoot, buttery avocado that melts on your tongue, and silky tuna that brings the entire dish together. Each bite is a little celebration in itself. I’ve lost count of how many times I’ve made this for friends who swear they “don’t like salads” (spoiler: they always ask for seconds). Whether you’re meal-prepping for the week or hosting a last-minute girls’ night, this recipe’s your new wingman. Let’s get those pans sizzling!
The Time I Turned a Sushi Disaster Into Salad Magic
Okay, confession time: This recipe was born from a full-on kitchen faceplant. You know those moments where everything goes wrong but then something magical happens? That’s the genesis of this dish. Years ago, I tried impressing my date with homemade sushi rolls. I thought I had it all figured out—how hard could it be, right? Spoiler alert: very hard. The rice? Mushy. The nori? Torn into pieces that looked like they’d been through a blender. The tuna? Let’s just say it looked…sad. It didn’t help that I was working under a time crunch and trying to appear cool and collected. Instead, I was battling my kitchen like a contestant on a reality show. But instead of giving up and ordering takeout like a sane person, I panicked, fried the rice scraps into crispy bites, and tossed everything into a bowl. Voila! A “deconstructed sushi salad.”
Reader, he married me. (Okay, fine, we dated for six months, but STILL.) Sometimes the best things come from complete and utter disasters in the kitchen. And now, years later, I make this salad every week, no sushi mat required. Moral of the story? The kitchen is a playground, and sometimes, glorious, delicious mistakes lead to the best dishes. So embrace the chaos, and remember—kitchen failures can turn into glorious victories.
What You’ll Need (+ Chef’s Secrets!)
Before we dive into the action, let’s talk about the ingredients. These are the magic components that will elevate this dish from “meh” to “WOW!” Here’s everything you’ll need to create crispy rice perfection, plus a few secret tips to make your version next-level:
1 cup cooked sushi rice (chilled)
-
Sushi rice is your friend in this dish. It’s stickier than regular rice, making it perfect for creating crispy rice squares that hold together beautifully. Pro Tip: Day-old rice works best for frying. It’s drier and less sticky, giving you the crispiness we’re after. If you don’t have sushi rice on hand, don’t panic! Short-grain risotto rice can sub in as a quick fix.
1 tbsp rice vinegar
-
Rice vinegar is your secret weapon here. Its subtle tang balances the richness of the tuna and avocado, cutting through the creamy texture with a zesty lift. If you’re fresh out of rice vinegar, don’t fret. You can mix 1 tsp of lemon juice with ½ tsp of sugar for a speedy fix that’ll give you the same bright acidity.
1 tsp sesame oil
-
This is the flavor MVP of the dish. Toasted sesame oil has a deep, nutty depth that gives your crispy rice a rich, savory undertone. If you’re allergic or just can’t find sesame oil, no worries. You can skip it, and the soy sauce will still bring the necessary umami punch.
Crispy Rice Bootcamp: Let’s Get Layered!
Now that we’ve got the ingredients, let’s dive into the steps. This recipe is all about layering flavor and texture. The crispy rice squares are the star, and we want them to shine, so let’s treat them like royalty.
Step 1: Rice TLC
Start with your chilled, day-old sushi rice. To make sure it fries up crispy, mix it gently with rice vinegar and sesame oil. Think of it like folding a delicate omelet: slow and steady, so you don’t squish the rice grains. Pro Tip: Wet your hands when handling the rice. This prevents it from sticking to your fingers and makes the process way easier.
Now, spread the rice mixture onto parchment paper. We want to press it into a ½-inch thick layer. Don’t skimp on this step—it’s all about getting that perfect crispy texture. The rice might feel a little clingy, but trust me, it’s worth it. Let it sit for about 30 minutes. Why chill the rice? Cold rice fries up crispy and holds its shape better than warm rice. So trust the process, even if it feels like you’re waiting forever!
Step 2: Fry Like You Mean It
Once your rice layer has had a chance to chill, it’s time to fry. Heat up some neutral oil—avocado oil or grapeseed oil works wonders. You want the oil hot and shimmering (about 350°F). Pro Tip: To check if the oil’s ready, drop a small rice crumb into the pan. If it sizzles instantly, you’re good to go. Fry the rice squares in batches, about 2-3 minutes per side, until they’re golden and crispy. It’s crucial to not overcrowd the pan, so be patient and fry in small batches.
Once the squares are fried to crispy perfection, drain them on paper towels to avoid sogginess. Sogginess is the enemy here, so this step is key to keeping your rice crispy and satisfying.
Plating: Where Edible Art Meets Flavor
Okay, you’ve got crispy rice squares that are golden and crunchy, now it’s time to plate. This part is where the magic happens. We’re not just making a salad; we’re creating an edible work of art.
Start by arranging your crispy rice squares on a plate like edible dominos. Take your time with this part—it’s all about making sure each square is beautifully placed. Then, top each crispy rice square with a delicate layer of creamy avocado slices. Pro Tip: I like to use a sharp knife to cut the avocado into thin, even slices for that perfectly “Instagrammable” look.
Now, for the showstopper: your tuna. Whether you’re using sushi-grade tuna or a less expensive option, cut it into small cubes or thin slices (whichever you prefer). Gently layer the tuna on top of the avocado. At this point, I like to drizzle a little leftover soy-sriracha mixture over the whole thing. This spicy-sweet sauce adds an extra layer of flavor that’ll have everyone asking for the recipe.
Finish the whole thing with a sprinkle of sesame seeds and freshly chopped green onions. Why? Because we eat with our eyes first. The green onions provide a fresh, zesty crunch, while the sesame seeds add a touch of texture and a hint of nuttiness. You’re not just making a salad; you’re creating a masterpiece.
Mix It Up: Your Recipe, Your Rules!
The beauty of this recipe is that it’s super customizable. If you want to make it your own, here are a few easy swaps and additions you can try.
-
Spicy Mayo Drizzle: If you’re into a little heat, mix 1 tbsp of mayo with ½ tsp of sriracha. This creamy drizzle adds the perfect balance of spice and richness.
-
Vegetarian Twist: For a vegetarian version, swap the tuna for marinated watermelon radishes. These radishes have a subtle sweetness and a nice crunch that mimic the texture of the tuna without compromising on flavor.
-
Hawaiian Style: Take it to the next level with diced mango and toasted macadamia nuts. The tropical sweetness of the mango pairs beautifully with the savory tuna and crispy rice. The macadamia nuts add a delightful crunch that will have your taste buds dancing.
Confessions from My Kitchen Diary
True story: I once tried to swap quinoa for rice. The result? Well, let’s just say that quinoa is not a good substitute here. It ended up being mushy and sad, with little crispy texture to speak of. Take it from me—stick with sticky sushi rice for the best results. It’s the foundation of this dish, and no substitutions can quite replicate its unique texture.
Over the years, I’ve made some other fun tweaks to this recipe. For instance, I now like to add a few sprinkles of pickled ginger for an extra zing. It’s a game-changer! And when I’m feeling fancy, I’ll layer everything into mason jars for a cute picnic presentation. Pro Tip: Double the batch! These crispy rice squares disappear faster than cookies at a bake sale. Trust me, you’ll be glad you did.
Your Burning Questions, Answered!
Q: Rice won’t crisp up! Help!
A: Don’t worry, you’re not alone! Here’s the deal: make sure the oil is hot—350°F is ideal. If the oil isn’t hot enough, your rice won’t crisp up properly. Also, be sure to let your rice cool completely before frying, as warm rice will just absorb all the oil and get mushy.
Q: Can I use canned tuna?
A: Yes, but only in a pinch. If you go this route, be sure to drain the tuna well. Mix it with about ½ tsp of mayo to restore some moisture. However, if you can get your hands on fresh sushi-grade tuna, that’s the gold standard.
Fuel Your Foodie Adventures
Per Serving: 320 cals | 22g protein | 14g fat | 28g carbs
Gluten-free option: Use tamari instead of soy sauce!
Now, you’re ready to take on the crispy rice salad world. Whether you’re creating this dish for a special occasion or just craving a little joy on a sunny day, this recipe is sure to bring big flavor to your life. Let’s get cooking!