Snap, Crackle, Pop into Summer with Red, White & Blue Rice Krispie Treats
Hey there, fellow foodies! Chef here, ready to sprinkle some summer magic into your kitchen. Picture this: It’s the Fourth of July, the grill’s fired up, and the smell of sunscreen mixes with laughter as kids chase fireflies. Uncle Bob is flipping burgers with tongs in one hand and a beer in the other. Grandma’s holding court under the patio umbrella with tales from “when fireworks only cost a quarter,” and your playlist is hitting just the right mix of country and pop. But the real star of the show? A tray of Red, White, and Blue Rice Krispie Treats sitting proudly next to the apple pie.
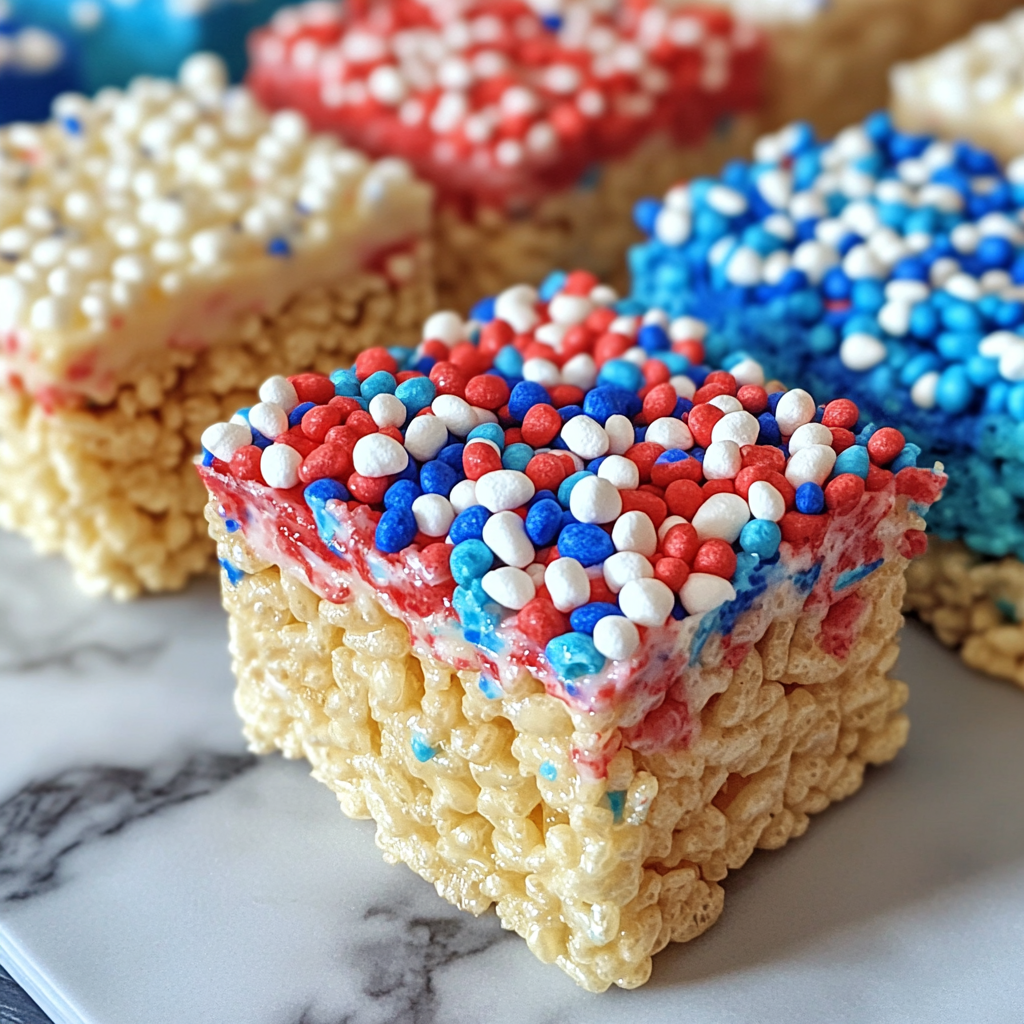
These aren’t just snacks—they’re edible fireworks, and I’m here to show you how to make them the life of the party. They’ve got crunch, chew, and color, all packed into the easiest no-bake dessert you’ll make all summer. Think of them as the snack version of a parade: bright, nostalgic, and a total crowd-pleaser.
Now, I know what you’re thinking: “Rice Krispie treats? Really?” But trust me, this isn’t your average after-school snack. With a little food coloring and a whole lot of patriotism, we’re turning a classic into a showstopper. Plus, they’re foolproof. No oven required, minimal cleanup, and kids can dive right into the sticky fun (bonus points for licking the spoon!). Whether you’re hosting a backyard BBQ or packing a picnic for the fireworks, these treats are your ticket to becoming the MVP of summer desserts.

The Time I Accidentally Dyed My Dog Patriotic (And Other Kitchen Adventures)
Let me take you back to my first attempt at these treats. It was 2015, and I’d volunteered to bring dessert to my niece’s “Uncle Sam’s Birthday Party.” (Kids, right?) I’d just started my food blog and was determined to make these Rice Krispie bars Insta-worthy. Picture me in a tiny apartment kitchen, plastic bowls everywhere, one hand on a spatula, the other wrestling with a dropper of red food dye. Things were going well… until they weren’t.
In my rush to layer the colors, I knocked over the open bottle of red food dye. It tipped like a slow-motion horror scene—straight onto my golden retriever, Baxter, who was loyally waiting for crumbs. Suddenly, Baxter was sporting red polka dots, the kitchen looked like a crime scene, and my “white” layer had turned pink from bleeding dye. Cue the panic!
But here’s the thing: The kids at the party loved the tie-dye effect, and Baxter became a temporary celebrity. That day taught me two chef secrets:
-
Always close food coloring lids tightly.
-
Imperfections often taste better than perfection.
Now, making these bars is a yearly tradition—Baxter gets a bandana now instead of a dye job—but the messy joy remains. It’s one of those recipes that reminds me why I love cooking: not just for the taste, but for the memories that come with it. Ready to create your own sticky-sweet memories? Let’s grab that spatula!
Ingredients & Swaps for Every Foodie
Here’s your grocery list for your Red, White & Blue Rice Krispie Treats:
- 6 cups Rice Krispies cereal – The OG snap! For gluten-free folks, Malt-O-Meal’s Crispy Rice is a great sub. Just double-check that label if gluten is a concern.
-
1 (10 oz) bag mini marshmallows – Minis melt faster and more evenly. Vegan? Look for Dandies marshmallows. Want to go natural? Trader Joe’s also carries gelatin-free versions.
-
3 tbsp butter – Salted butter adds that perfect balance of sweet and savory, but if you’re dairy-free, coconut oil is a great substitute and adds a subtle tropical twist.
-
Red & blue food coloring – Gel colors (like AmeriColor or Wilton) give those vibrant hues without watering down your mix. Liquid dyes can work, but beware the pastel trap!
-
Patriotic sprinkles (optional) – Stars, nonpareils, or edible glitter if you’re feeling fancy. Just skip the sugar strands—they tend to melt and run.
Chef’s Hack: Out of food coloring? You can go au naturel. Crush freeze-dried strawberries (for red) and blueberries (for blue), then stir the powders into your marshmallow mixture for a naturally tinted treat. Not only does it look amazing, but it adds a subtle fruity flavor that’s totally welcome.
How to Make Red, White & Blue Rice Krispie Treats
Alright, it’s go-time. These layers come together quickly, so have everything ready before you start melting.
Meltdown Magic
In your largest pot (trust me, go big), melt the butter over LOW heat. Don’t rush this part. Toss in the marshmallows and stir like you’re whisking clouds. “Low and slow” is your mantra here—burnt ‘mallows taste like regret and smell worse.
Pro Tip: Add the marshmallows gradually to avoid clumping, and stir constantly until velvety smooth.
Divide & Conquer
Once smooth, split the mixture into three bowls. You’re going to tint one red, one blue, and leave the third white. A drop or two goes a long way with gel coloring, so start small and adjust. If you don’t want rainbow fingertips for a week, wear gloves (or embrace your inner Smurf).
Cereal Clusters
Working fast, mix 2 cups of cereal into each bowl. Fold gently—overmixing makes for tough treats with less snap. Remember, we want crunch with a little chew, not concrete bricks.
Layer Like a Boss
Grease a 9×13-inch pan with cooking spray or butter (don’t skip this step!). Press the red layer in firmly using wet hands or a piece of parchment. This helps avoid sticky fingers and uneven spreading. Then, carefully layer the white, and finish with blue.
Secret Weapon: Slightly warm each layer with a hairdryer (on low!) to help them bond together without squishing the previous layer. Weird? Yes. Effective? Absolutely.
Sprinkle Party
Add your sprinkles now while the top layer is warm—they’ll stick better and won’t fall off like confetti later.
Let cool for at least 30 minutes. I know, the wait is pure agony, but cutting them too early = sticky chaos. Distract yourself with potato salad duty or a little dance to the “Yankee Doodle” remix.
Serving Red, White & Blue Rice Krispie Treats
Once your treats have cooled and firmed up, it’s time for the big reveal. You can cut these into traditional rectangles or go full Martha Stewart with star-shaped cookie cutters for that Pinterest-perfect presentation.
Here’s a few fun ways to serve them:
-
Platter of patriotism: Stack on a white platter with fresh blueberries and strawberries for a fruity flag effect.
-
Treat bags: Wrap bars in cellophane with red-and-blue ribbons—great for picnics or party favors.
-
Over-the-top sundae: Pair with vanilla ice cream and a drizzle of raspberry or blueberry sauce.
-
Grandma-chic: Serve on vintage Pyrex or an antique cake stand. Nostalgia never tasted so good.
Mix It Up: 5 Fun Twists
Feeling creative? This base recipe is a blank canvas for all kinds of festive spin-offs:
-
Confetti Cake: Add 1 tsp vanilla and rainbow sprinkles to the white layer for birthday cake vibes.
-
Berry Blast: Use freeze-dried strawberry and blueberry powder for natural coloring and flavor.
-
Chocolate Patriot: Melt white chocolate and drizzle over the cooled bars for a creamy finish.
-
Gluten-Free Glow-Up: Just swap in certified GF crispy rice cereal. Everything else stays the same!
-
Holiday Remix: Swap the red and blue for green and white (St. Paddy’s Day), pink and purple (Easter), or orange and black (Halloween).
Chef’s Pro Tips & Kitchen Confessions
Let’s be real: No one nails it perfectly the first time. Here’s what I’ve learned after years of sticky fingers and sugar highs:
-
Use gel food coloring: Trust me. Liquid dye gives you pale pinks and watery blues. I once made a batch that looked like it belonged in a Pepto-Bismol commercial.
-
Keep a warm bowl handy: If the marshmallow mixture stiffens too fast, pop the bowl in the microwave for 5-second bursts to loosen it back up.
-
Don’t worry about perfection: A little swirl here, a little color bleed there? Call it “vintage Americana.” These treats are meant to be fun, not fussy.
-
Don’t leave them uncovered: They’ll dry out faster than you can say “firecracker.” Store in an airtight container and you’re golden.
You Asked, I Answered: Rice Krispie Rescue
Q: Why are my bars rock-hard?
A: Most likely, you overcooked the marshmallows. Melt them gently over low heat and stir constantly. If they’re already hard, chop ’em into chunks and call it “patriotic brittle.” Serve with ice cream or mix into yogurt parfaits. No treat left behind!
Q: Can I make these ahead?
A: Heck yes! They hold up for 2–3 days in an airtight container. Just separate layers with parchment if you’re stacking them.
Q: Help! My colors mixed together.
A: Let each layer cool for at least 5 minutes before adding the next. If the bleeding already happened, embrace the marbled look and say it was “on purpose.” Some of my most popular batches were happy accidents.
Nutrition Per Treat (Approximate):
-
Calories: 140
-
Fat: 3g
-
Carbs: 28g
-
Sugar: 15g
-
Protein: 1g
-
Sodium: 95mg
Wrapping It Up (Like a Treat Bag Bow)
There you have it—your all-in-one guide to whipping up Red, White, & Blue Rice Krispie Treats that bring joy, nostalgia, and a whole lot of color to your table. Whether you’re celebrating the Fourth, Memorial Day, or just love a reason to add sparkle to your snacks, this recipe has you covered. It’s festive, simple, and just the right amount of messy.